
Products › BaseNode Packs › Motion Graphics › Tutorial: The clone wall
The clone wall
A wall of 180 clones, cubes, balls and pucks, that ripples as a wave passes through it: the clones it reaches jump out, turn and grow, light up, then spring back past their place and settle. This is MoGraph as Cinema 4D taught it, a cloner, effectors and falloffs, made in Geometry Nodes. Each step adds one of them, in one or two lines.
You will learn
- The craft. Clone a shape on a grid, pick each clone from a collection, move them with effectors, decide where with falloffs that sweep across, give them inertia with a spring, and colour them by how much the effect weighs.
- The language. A pipe of
|>lines, one effector each, in the order they act; a falloff is a value,w = …, handed to the effectors as theirweight;SceneTime()to animate; a value stored on each clone and read back by the material.
This page goes fast on the basics. If .bn is new to you, start with Lunar ground: it explains a graph, its nodes as calls, fields, and the way a step file is read.
Before you start
You need Blender 5, the Base Node add-on, and the Motion Graphics pack, version 0.13.1 or later.
The pack is sold by the author of Base Node, apart from the open source project: the steps below are free to read, copy and change; the modules they use come with the pack, and are not.
| Module | Kind | What it gives |
|---|---|---|
cloners | geometry | A geometry instanced on a line, a circle, a grid, a curve or a mesh, whole or picked from a collection; each clone stores its index and a factor from 0 to 1. |
effectors | geometry | Move, turn and scale the clones: random, plain, step, noise, oscillate, time, and delay and spring, which follow over the frames. Each takes a weight. |
falloffs | geometry | That weight, from where a clone is: in a sphere, a box, along an axis, in a sector; inverted or combined. |
Every block below is a complete .bn file, its code beside the nodes it builds. Two ways to try a step:
- Drag it. Drag the file icon of its block, or its title, onto empty space in Blender's 3D Viewport, and keep Instantiate the Example: a new object carries
clone_wallat the 3D cursor. A click on the file icon downloads the file instead. - Paste it. Press the copy button of its block, open a Geometry Node editor, press Ctrl+Shift+V and pick Add as Modifier, on any mesh object: the graph makes its own wall and ignores the mesh it is given.
Press Space to play the steps that move. The springs of steps 6 to 8 are simulated from the first frame: play from there, not from a frame picked in the middle.
The pictures are rendered with EEVEE from these exact files by render.py, in front of the same backdrop, under the same lights.
Three kinds of node
MoGraph splits the work in three, and so does the pack:
- A cloner makes the clones, as instances:
shape |> grid_cloner(…). - An effector takes the clones and moves, turns or scales each one, then passes them on: one line each,
|> random_effector(…),|> noise_effector(…). They add up in the order of the pipe. - A falloff is a number from 0 to 1 for each clone, by where it is. Given to an effector as its
weight, it says where the effect is full, where it fades, and where it is not.
The clones stay instances until the last line, RealizeInstances(): until then, an effector moves 180 transforms, not 180 meshes, and stays fast.
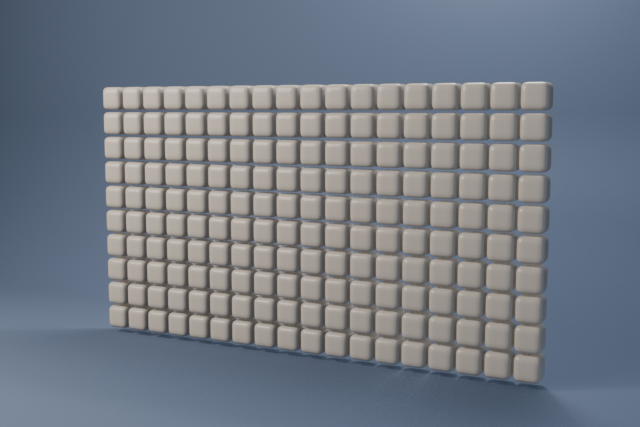
1. A grid of clones
One rounded cube, 20 cm wide, cloned 18 × 10 times, 22 cm apart. grid_cloner lays the grid on the floor plane; TransformGeometry stands it up into a wall.
step1_grid.bn: clone_wall, rounded_cube, clone_paint
rounded_cubeis a graph of the file, not of the pack: a denseCubewhose every point is pulled toradiusfrom a smaller cube inside it. Its edges and corners come out round, as a bevel would make them.- The wall is turned as a whole, at the end: the effectors to come work on the flat grid, where out of the wall is simply +Z.
clone_paintis a shader group, satin plastic of the colourpaint; the materialCreamcalls it.
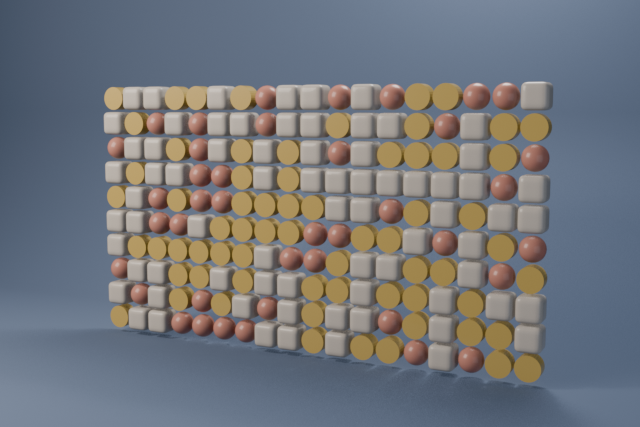
2. Picked from a collection
A wall of one shape is a pattern; a wall of a few is a design. GeometryToInstance makes a collection of three shapes, each with its material, and the cloner picks one for each clone.
step2_pick.bn: clone_wall
pick: Randompicks one at random, the same one for a givenseed: change the seed for another wall.pick: Cycletakes them in turn, cube, ball, puck, cube…;Wholeclones the whole collection each time.- The ball is
rounded_cube(radius: 0.1): a cube rounded by half its size is a sphere. - The materials are
clone_paintthree times, with three colours: one group to change, three materials that follow.
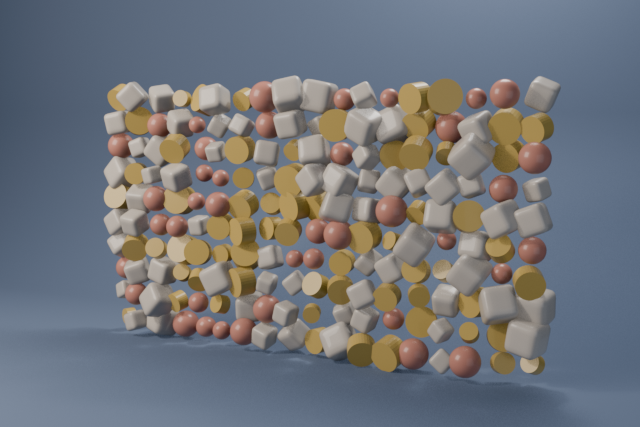
3. A random effector
The first effector: random_effector moves each clone by up to offset, turns it by up to rotation and scales it by up to scale, either way, at random.
step3_random.bn: clone_wall
- The offset is mostly on Z, out of the wall: a few centimetres sideways would make the clones collide; out of the wall, they only stand at different depths.
- Random is not noise: two neighbours get unrelated values. That is what makes the wall look scattered rather than wavy.
- Its
seedis its own, apart from the cloner's: the same mix of shapes, jumbled another way.
4. A noise in time
noise_effector moves the clones by a noise of space: unlike random, neighbours move together, in patches about size wide. Its speed makes the noise flow with the time of the scene: the wall starts to breathe.
step4_noise.bn: clone_wall
- It comes after
random_effectorand adds to it: the wall stays jumbled, and the jumble swells. - The noise is read where each clone is, after the effectors before it moved them. Put the noise first to read it on the regular grid.
- The effector reads
SceneTime()itself: no keyframe. Press Space.
5. A falloff sweeps across
An effector everywhere is a texture; an effector somewhere is an event. spherical_falloff is 1 within a sphere and fades to 0 at its edge. Given as the weight of every effector, the random one, the noise and a new plain_effector, it decides where the clones come out of the wall.
step5_falloff.bn: clone_wall
wis a field: it is computed for each clone, from its position, inside each effector that takes it. One line of falloff, as many effectors as you like.frontmoves the sphere across the wall, from off its left side to off its right, once everyperiodseconds, byfractof the time: as the sphere leaves on the right, it comes back on the left, out of sight, and the animation loops.plain_effectorpushes every clone by the same amount; weighed, it is a bump that follows the sphere. The random and noise effectors, weighed too, now only stir the clones in it: out of the sphere the wall is at rest, flat again.
6. A spring behind
Step 5 is exact, and stiff: a clone is where the falloff says, frame by frame. spring_effector gives it a mass: pulled toward where the effectors before put it, it leaves late, overshoots, and swings back.
step6_spring.bn: clone_wall
- It comes last, after the effectors it follows: it does not move the clones somewhere, it moves them toward where the pipe before it says, a little each frame.
stiffnesspulls,dampingbrakes. Less damping, more swings; less stiffness, slower and later.- It is a simulation, frame after frame from the first: play the scene from its start. Its position springs; its rotation and scale follow at once.
delay_effectoris its calm sibling: late, never past.
7. A band of two falloffs
A wave is a band, not a ball. linear_falloff is a ramp along an axis: 0 behind its origin, 1 a length further on. Two of them make a band: one rises up to the front, the other, inverted, falls down past it; where both are high is the band.
step7_band.bn: clone_wall
invert_falloffturns a ramp up into a ramp down: 1 where it was 0.combine_falloffs(…, mode: Minimum)keeps the lower of the two at each clone: a tent, 0 on both sides and 1 atfront.Maximumwould give their union, here the whole wall.acrosstilts the axis: the band crosses the wall on a slant, so that it reaches the bottom of a column before its top.- The rest of the pipe is step 6: only
wchanged. That is the point of falloffs: the shape of the event is apart from what happens in it.
8. Coloured by the weight
The last touch: the clones light up where the effect weighs. StoreNamedAttribute keeps w on each clone as weight; the material reads it back with Attribute and mixes the clone's colour toward hot, with a glow.
step8_color.bn: clone_wall, clone_paint
- The weight is stored on the instances;
RealizeInstanceshands it to every point of each clone's mesh, where the material finds it. - It is stored right after the cloner, where each clone stands on the grid. The effectors move, turn and scale the clones and keep what they carry, the spring too: it moves the clones of each frame.
- The glow is
w * w: weak on the sides of the band, bright only at its crest.
The knobs
A few to start with, on the last step:
| Where | Input | What it does |
|---|---|---|
clone_wall | period | Seconds for the band to cross the wall: the tempo. |
clone_wall | across | The direction the band sweeps: (1, 0, 0) straight across, (0, 1, 0) from the floor up. |
grid_cloner | count_x, count_y, spacing, pick, seed | How many clones, how far apart, which shape each one is. |
plain_effector | offset, scale | How far out the clones in the band come, and how much they grow. |
spring_effector | stiffness, damping | How fast and how springy they follow. |
clone_paint | paint, hot, glow | The colour at rest, under the band, and how bright it glows there. |
Try: on step 8, set damping to 1.5: the wall rings long after the band. Give the effectors invert_falloff(w) instead of w: the whole wall stands out, and the band is a trough that runs through it. Swap grid_cloner for radial_cloner(count: 48, radius: 1.5) and the band sweeps a ring.
Take it to Blender
The finished wall, in one file. Drag the card onto empty space in Blender's 3D Viewport and keep Instantiate the Example: a new object carries clone_wall. A click on the card downloads the file.
The steps before it, to start again from any of them:
The files, with the script that renders this page's pictures, are in examples/tutorials/clone_wall/.